This report summarises the findings from a recent inspection of the kitchen and cloak room solid floor areas, with a particular focus on moisture readings and the effectiveness of the Damp Proof Membrane (DPM).
Observations
Elevated Radio Frequency Mode Readings: In certain areas of both the kitchen and cloak room, solid floors, the radio frequency mode readings were found to be elevated. This typically indicates a higher presence of moisture within the floor structure.
Low Pin Surface Readings: Conversely, the pin surface readings in these same areas were notably low. These readings generally reflect the moisture content at the surface of the floor covering, in this case, ceramic floor tiles.
Discussion
The disparity between elevated radio frequency readings and low pin surface readings suggests that moisture may be present deeper within the floor substrate, rather than at the surface. One plausible reason for these discrepancies could be the absence of a Damp Proof Membrane (DPM), or that the existing DPM is situated close to the surface of the floor. The DPM is designed to prevent moisture ingress, and its effectiveness is highly dependent on its correct placement within the floor build-up.
This indicates the absence of a Damp Proof Membrane (DPM) or if it is positioned close to the surface of the floor structure. This can lead to elevated sub-surface moisture levels while the surface remains relatively dry. The discrepancy in readings could also be attributed to hidden plumbing leaks, which should be investigated further.
Further investigation should be undertaken to confirm the presence and location of the Damp Proof Membrane in the affected areas.
If the DPM is found to be absent or improperly installed, remedial measures should be considered to install or reposition the membrane to ensure adequate moisture protection.
Regular monitoring of moisture levels in these areas is advised to prevent potential long-term damage.
Consultation with a qualified damp proofing specialist may be beneficial to determine the most effective solution for these discrepancies.
Conclusion
The findings highlight a potential issue with moisture ingress in the kitchen and cloak room walls, likely related to the Damp Proof Membrane. Addressing this promptly will help maintain the integrity of the floor and walls and prevent further complications.
Insurance Backed Guarantees which protect our customers for up to 10 Years can be provided by QANW UK’s leading Insurance Backed Guarantees for a sum fee.
It is important to note that the primary factor in the development of mould is the presence of moisture. However, the availability of food, oxygen, and temperature also plays a significant role. The likelihood of mould growth on a material can vary.
According to Approved Document F, if the relative humidity remains consistently high for extended periods, mould growth is likely to occur. The table below, sourced from Approved Document F, outlines the specific relative humidity levels needed for mould growth to take place. It also emphasises the importance of the duration of high humidity in the potential for mould growth.
Indoor air relative humidity
Moving average period
Room air relative humidity
1 month
65%
1 week
75%
1 day
85%
An important consideration is that these measurements are significantly lower than the 100% relative humidity needed for surface condensation to form. Liquid water does not need to be present for mould to grow. Given the right conditions of a suitable surface and sufficiently high relative humidity levels, mould spores can germinate and lead to growth.
The UK’s growing population, high property values, housing shortages, and increased density have significant shifts in the way homes are occupied. These changes, along with other factors, have affected the internal environment of homes. For instance, the rapid increase in fuel costs has led to a push for greater fuel efficiency to meet international carbon reduction obligations. Government-backed programmes promoting insulation and draught proofing have altered the ability of some buildings to remove atmospheric moisture. Consequently, issues related to moisture, such as condensation and mould, are becoming more prevalent in UK homes, leading to more disputes between landlords and tenants regarding the causes of dampness.
Moisture in the air has always been a crucial concern for building surveyors. While the ventilation industry and building regulations have made significant progress in meeting the needs of new house constructions, occupants of older houses and flats still face challenges with moisture-related issues such as condensation and mould.
In the past, problems with condensation and mould growth were often dismissed as being the fault of the occupant. However, these issues can be complex and difficult to resolve by simply reducing moisture production. In many cases, adjusting heating and ventilation systems is a more practical solution than trying to decrease moisture levels if there is no obvious excessive source of moisture.
Achieving a balance between moisture production, insulation, heating, and ventilation, along with a good understanding of the science of air moisture and condensation, is essential for preventing condensation and mould growth. These problems are often multifaceted, and a comprehensive approach involving the entire building envelope is necessary to identify the root cause.
It is important to consider the building as a whole when addressing condensation and mould issues, rather than focusing solely on internal atmospheric conditions.
Insulation
The drive to reduce energy use and increase thermal performance in dwellings has, in part, been achieved by the control of draughts and the controlled release of moisture through the fabric of the building. In some situations, this has resulted in properties that are incapable of managing atmospheric moisture during periods of high moisture production. It therefore follows that the planned management of atmospheric moisture through positive or passive ventilation must be designed around the use and occupation style of the dwelling.
Any retrofit insulation measures should be noted during the external checks. Whilst the insulation helps to regulate internal temperature, the surveyor should ensure that the insulation is continuous and that no cold bridges have been formed as a result of discontinuity in the insulation. These are typically found around windows or at the base of walls where the insulation has been terminated above the level of the damp proof course.
Relative Humidity
The internal relative humidity is a crucial factor in the development of mould. The air typically contains water vapour in different amounts, with its capacity to hold moisture linked to temperature. Warmer air can hold more moisture. The level of moisture in the air is commonly measured as Relative Humidity (RH), which is a percentage of the maximum water vapour the air can hold at a specific temperature. When the air is saturated and cannot hold any more water vapour at the current temperature, it has a relative humidity of 100%.
If the air temperature decreases to the saturation point, it reaches a critical temperature where it cannot hold any more water, known as the dew point. At this temperature, water vapour is forced to condense into liquid water. This phenomenon explains why warm, moist air in contact with a cold wall or window causes condensation. Since relative humidity is influenced by temperature, caution should be exercised when using relative humidity alone, as fluctuations may be due to changes in temperature rather than an increase in moisture.
Using RH whilst surveying
Equipped with the information provided, it is possible to ascertain if condensation is present during a survey. However, due to time constraints and the changing levels of relative humidity, long-term monitoring is more reliable for determining if conditions are consistently conducive to mould growth.
By using a surface thermometer and hygrometer to measure wall temperature and relative humidity in a room, it is relatively straightforward to determine if the surface temperature is at or below the dew point, indicating potential condensation areas. Areas with restricted airflow, such as corners and behind furniture, are typically cooler and should be the first places to measure surface temperature. Taking readings from the wall’s centre may not accurately represent these cooler areas. Therefore, it is essential to have a hygrometer and surface thermometer as part of their diagnostic equipment when assessing defects in buildings.
Vapour pressure and moisture production
Vapour pressure, or equilibrium vapour pressure, is the pressure at which water vapour above water is in thermodynamic equilibrium with its liquid state. If the pressure is increased, the water vapour would condense.
In contrast to relative humidity, vapour pressure gives a measurable amount of moisture rather than a proportion and can help to determine levels of moisture production in relation to ventilation. This can be calculated by establishing the internal relative humidity and temperature, and then using a conversion factor to determine the vapour pressure. The same process is then carried out for external relative humidity and temperature.
By subtracting the external vapour pressure from the internal, a vapour pressure differential can be obtained. Due to moisture production from human activities such as showering and cooking during the winter months, indoor moisture levels are usually higher than external.
An average vapour pressure differential of 0.45kPa may be acceptable, although additional data may be needed for a more detailed assessment. Below 0.45kPa is typically considered “dry” or acceptable when ventilation balances moisture production, while above 0.6kPa is deemed “wet occupancy.”
It is important to note that relative humidity and vapour pressure data collected during a snapshot survey may be limited in its scope. Additionally, it is uncommon for a surveyor to be on-site at the optimal time when conditions for condensation and mould growth are present. Moreover, the use of purge ventilation, such as opening windows, is often done before an inspection, resulting in data that may not accurately reflect the occupants’ day-to-day living conditions.
Logging data over extended periods can provide more accurate information and help to create a more precise understanding of the typical moisture production within the property.
Ventilation Ventilation is a crucial factor in managing humidity levels within a property. Inadequate ventilation can lead to indoor air quality problems such as condensation and mould growth. Conversely, excessive ventilation can cause heat loss and reduce energy efficiency.
Several recent studies have revealed that ducting is a significant factor in ventilation systems failing to meet the required standards, with flexible ducting being identified as particularly problematic.
The necessary amount of fresh air will vary depending on the specific dwelling and the number and activities of the occupants. It is essential to have a sufficient supply of fresh air to control pollutants and to safely and efficiently operate combustion appliances like gas fires.
Building Regs
The Means of Ventilation section in Approved Document F is often overlooked in building regulations compliance, despite its potential impact on occupant health. While strides have been made in improving ventilation requirements in modern housing, older properties may still have inadequate ventilation systems.
Properties built after 2010 are supposed to comply with Building Regulations and have proper ventilation in place. However, enforcement of these regulations is lacking, leading to potential issues in newer properties as well. When dealing with mould issues in post-2010 properties, it is important to check if the ventilation system has been installed and commissioned according to Approved Document F. Occupants should have been provided with a record of this information.
Determining the appropriate level of ventilation can be challenging, with only guidelines from Approved Document F available. It is recommended that building surveyors have a hygrometer on hand to assess the effectiveness of ventilation systems.
Heating
The heating system can have a significant impact on dampness issues and should be able to maintain consistent air and surface temperatures. This will help prevent problems related to excess moisture. It is preferable to have a steady background heat rather than intermittent heating, as this will help keep the building fabric at a higher ambient temperature. The building surveyor should make note of the type of heating system and the location of heating elements. During a quick survey, it may be challenging to identify problematic heating practices, but long-term monitoring will give a better understanding of the heating system.
Different heating methods can present various issues, but irregular use and certain types of heating can be major contributors to condensation and mould growth. Simply heating the air is unlikely to solve the problem, both due to cost and practicality. Condensation will occur if cold surfaces are not addressed. Therefore, any remedial action should focus on reducing moisture levels and eliminating cold surfaces.
Insurance Backed Guarantees which protect our customers for up to 10 Years can be provided by QANW UK’s leading Insurance Backed Guarantees for a sum fee.
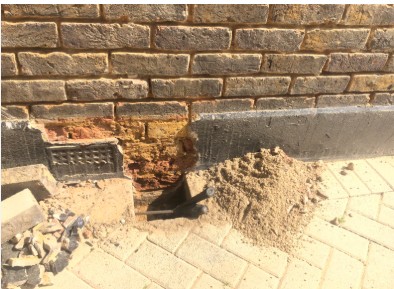
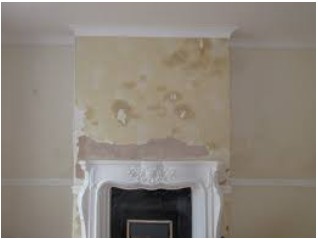
Damp walls are a common problem that can stem from various sources, including condensation, rainwater penetration, and rising damp. Identifying the cause is the first step in effective treatment.
Causes of Damp Walls:
Condensation:
Warm, moist air meeting cold surfaces can condense, leading to dampness and potential mold growth.
Insurance Backed Guarantees which protect our customers for up to 10 Years can be provided by QANW UK’s leading Insurance Backed Guarantees for a sum fee.
The survey of the current wall ties in a property constructed before 1981 should be conducted in three phases, covering all facades to comprehensively evaluate the state of the existing wall ties.
Phase 1: Visual inspection
Phase 2: Cavity inspection
Phase 3: Tie end inspection
Phase 1: Visual inspection
The surveyor should visually inspect all elevations of the property and make notes and take photos. Special attention should be given to horizontal, diagonal, stepped cracks and bulges in walls.
Photo showing horizontal cracks indicating wall tie corrosion
If no cracking or bulging is noted, this does not mean the property is free from wall tie corrosion. Cracks can be repointed or covered with render coatings, and bulging does not always appear on walls that don’t receive high wind loads. The inspection should move on to the next phase.
Phase 2: Cavity inspection
Using a metal detector, the position of an existing wall tie can be identified and marked with chalk. Then, a 12mm hole can be drilled into the cavity to allow an endoscope inspection if the walls have cavity wall insulation (CWI) installed; then, a brick will need to be removed to inspect the condition of the existing tie. If the cavity inspection finds no corrosion, the inspection should move on to the next phase.
Photo using an endoscope showing that the existing wall tie has rusted away and is no longer tying the cavity wall together
Phase 3: Tie end inspection
Using a metal detector, the position of an existing wall tie can be identified and marked with chalk. Then the bed joint is chased out to expose the existing wall tie to inspect the condition of the existing wall tie end embedded in the external wall. If the tie end inspection finds no corrosion, then you can report that the property is free of wall tie corrosion and recommend reinspection in ten years.
The photo shows that the existing wall tie end embedded in the external wall has rusted out.
There are two common types of wood rot found in buildings, known as wet rot and dry rot. Both of these forms of fungal decay can result in structural damage to the property. Specialist building surveyors must be able to distinguish between the two types of wood rot to effectively address and eliminate future issues.
Dry rot is considered the most severe form of fungal decay and has the potential to cause extensive damage to the property. It can spread rapidly behide plaster to the next storey and destroy a significant portion of the timber within the building. Wet rot, on the other hand, is more prevalent than dry rot but is typically contained to areas where timber is exposed to moisture.
As specialist building surveyors, we can distinguish between the two types of wood-rotting fungi. Here are some key indicators to look out for when identifying signs of both wet rot and dry rot.
Identifying Wet Rot:
– Look out for a black fungus appearing on the timber. – The timber is likely to feel soft and spongy to the touch, with visible discolouration. – If the decay has dried out the timber, it will easily crack and crumble. – Damaged paint finish could indicate wet rot fungus, even if the paint looks fine on the surface but is rotting from the back.
Identifying Dry Rot:
– The fungus leaves deep cubical cracks running across the grain, with white sheets (known as mycelium growth) often present on the wood, masonry and behide plaster. – When exposed to light, the fungus may have a lemon-yellowish tinge. – The timber will be brown in colour and crumble due to dry rot feeding on it. – The presence of red dust spores. – Damage is usually limited to the timber, but in some cases, large flat mushroom-like fruiting bodies can easily grow through finishes such as plaster or skirting boards.
How is Dry Rot Treated?
Dry Rot is the most serious of all the property care issues that can affect your building. Dry rot should be treated by a specialist and should be treated as soon as possible before any further damage can occur from this form of wood rot. The process of how dry rot is treated is:
A specialist dry rot surveyor will visit the property to identify where the damp originates from the surveyor will accurately diagnose the cause of the damp issue, whether it is due to plumbing leaks, rising, penetrating damp.
The surveyor provides detailed information on how the external defects or others are causing the damp problem. However, the full extent of the outbreak is difficult to assess until full exposure works have been completed.
The technicians will remove all fungal decayed timber and plaster within a metre of the last visible traces of Dry Rot.
– Any structural roof or floor timbers that have been affected by dry rot will be replaced with new treated timbers.
-The dry rot-affected area will be treated with fungicide dry rot treatments.
-To prevent dry rot from occurring again in the future, underfloor ventilation will be installed to improve the airflow in the property.
How is Wet Rot Treated?
It is essential for a property to conduct a comprehensive inspection of the property in order to pinpoint the source of dampness.
Following the inspection, the surveyor will accurately diagnose the cause of the damp issue, whether it is due to plumbing leaks, rising, penetrating damp or condensation.
Any structural roof or floor timbers that have been affected by wet rot should be removed and replaced with new treated timbers. External timber door and window frames can have new wood scarfed in or filled with wood hardener and redecorated to prevent future deterioration.
Building surveyors must be aware that moisture meters and other methods used to identify the presence of moisture in building materials do not differentiate between dampness from various sources. Therefore, it is essential to consider all potential causes of dampness before concluding. BS 6576:2005 +A1:2012 is the Code of Practice for diagnosing damp in walls.
Causes of Dampness Dampness in buildings, excluding those recently built, usually stems from one of five natural sources: Rainwater penetrating damp, plumbing leaks, water from the air within the building, condensation, and water from the ground rising damp and salt damp when wall plaster gets contaminated with hydroponic salts.
Methods of Moisture Determination Accurate diagnosis of the cause of dampness is assisted by the ability to map the distribution of moisture within a wall and ideally measure the extent of dampness. There are three fundamentally different ways of determining and/or measuring moisture in brickwork and other masonry: 1. Electrical Conductivity and Capacitance 2. Chemical – Carbide method 3. Gravimetric – Oven drying method
Electrical Methods
These methods are non-destructive and provide quick and easy readings. However, in walls of uncertain composition, the electric method may not give a direct percentage reading of moisture content. Readings are typically recorded on a relative scale to establish the moisture pattern. Electrical methods are useful tools but can lead to confusion and incorrect diagnosis, especially where ground salts are present or the substrate being tested is conducting.
Conductivity Meters: Two probes are used to complete an electrical circuit through the meter on the wall’s surface or embedded in the wall’s depth. The electrical resistance in the wall influences the circuit and is affected by the moisture content.
Capacitance Meters: The meter or separate head with conducting plates or concentric rings is placed on the surface being measured for moisture content. The fringe capacitance in the sensor, influenced by moisture content, is measured by the meter. Some instruments use visual or audible indicators for changes in moisture content.
Gravimetric or Oven Drying Method
This is a destructive method where drillings must be taken from the wall. It is time-consuming and requires laboratory facilities, making it unsuitable for on-site use. However, it is the most accurate method available and can differentiate between ground moisture and hygroscopic moisture.
Chemical Method
The carbide meter is a destructive method, but it can be used on-site and provides rapid results. Although it does not directly distinguish between ground moisture and hygroscopic moisture, comparisons and in-depth drilling can offer a good indication.
Throughout the years, there have been numerous cases of cavity wall distress in the UK, which can be attributed to the corrosion of metal ties. This distress often presents itself as bulging, cracking, leaking, or in severe cases, the collapse of walls under high wind loads. It has become apparent that this issue could potentially affect almost all cavity-walled structures constructed before 1981, which amounts to around 10 million properties.
Cavity walls with metal ties have been used since the early 19th century and are particularly common in homes built in the southern and western regions of the UK during the early 20th century.
It is now evident that the longevity of bitumen and zinc coatings on these metal ties falls short of the 60-year life expectancy of the walls. This was recognised in the 1981 amendment to BS 1243, which increased the minimum zinc coating thickness on wire ties threefold.
Wall tie corrosion refers to the deterioration and eventual failure of metal ties that connect the inner and outer walls of a cavity wall, often due to the rusting of the metal. This corrosion can lead to horizontal cracking and separation of the brickwork, compromising the wall’s stability.
Here’s a more detailed explanation:
What are Wall Ties?
Wall ties are metal fasteners that connect the inner and outer layers of a cavity wall, preventing them from separating.
They are typically embedded in the mortar joints between the bricks.
Why do Wall Ties Corrode?
Older wall ties, particularly those made of mild steel, were often coated with paint or a galvanized layer, which could degrade over time.
Water ingress into the cavity wall, especially through cracks or damaged mortar, can accelerate corrosion.
The expansion of rust can cause the wall tie to expand, potentially pushing the bricks apart.
Consequences of Wall Tie Corrosion:
Horizontal Cracking:
As the wall ties rust and expand, they can lift the bricks above and create horizontal cracks in the mortar joints, often at regular intervals.
Loss of Stability:
The expansion and eventual failure of wall ties can weaken the wall, making it susceptible to movement and even collapse, particularly in areas exposed to high winds.
Bulging:
The outer leaf of the wall may bulge outwards as the ties corrode and fail, leading to a visible distortion.
Water Ingress:
Damaged ties can allow water to penetrate the cavity, leading to dampness and potential damage to the interior of the building.
Signs of Wall Tie Corrosion:
Horizontal Cracks:
Look for cracks that run horizontally across the wall, often aligned with the mortar joints.
Bulging:
Notice if the outer leaf of the wall appears to be bulging outwards.
Rust Stains:
Vertical lines of reddish-brown discoloration on the brickwork can indicate rusting ties.
Damp Patches:
In some cases, dampness inside the building, especially if it coincides with cracking or bulging on the exterior, can be a sign of wall tie failure.
Rattling Noises:
In high winds, a rattling sound may be heard if the outer leaf of the wall is no longer securely tied to the inner leaf.